Ever found yourself puzzled on how to defrost a mini fridge? Noticing frost buildup in your mini fridge? Don’t worry, this is the right place for a solution! Let’s learn how to defrost a mini refrigerator.
Defrosting a mini fridge is easy. It involves unplugging the fridge, emptying it, melting the ice, cleaning and drying the fridge, then plugging it back in.
- Why defrost a mini fridge?
- When to defrost?
- Defrosting frequency?
- How long does it take to defrost a mini fridge?
We will answer these questions and provide a guide on how to defrost a mini fridge.
Table Of Contents
- Signs Your Mini Fridge Needs Defrosting
- Preparing Your Mini Fridge for Defrosting
- Tools You Need to Defrost Your Mini Fridge
- How to Defrost a Mini Fridge? 3 Effective Methods
- Tips for Speeding Up the Defrosting Process
- Cleaning Your Mini Fridge After Defrosting
- Conclusion: Keeping Your Mini Fridge Frost-Free
- Frequently Asked Questions

Signs Your Mini Fridge Needs Defrosting
Curious if your mini fridge needs defrosting? Look for these common signs to determine if it’s time to defrost your appliance.

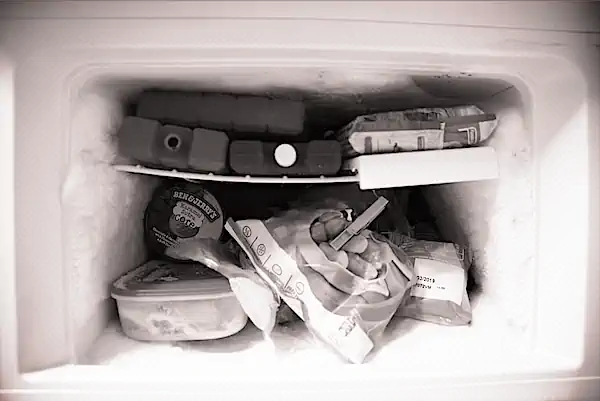
- Excessive Frost Build-up: Thick frost layer in the freezer compartment is a clear sign of needed defrosting. Frost build-up can consume storage space and reduce fridge efficiency.
- Reduced Cooling: Noticed your drinks aren’t as cool or your food doesn’t stay fresh for long? This could be a sign of excessive ice build-up in your mini fridge.
- Unusual Noises: If your mini fridge starts making weird noises, it might need defrosting. Ice build-up could be making the fan hit ice, causing these sounds.
- Increase in Energy Consumption: Is your mini fridge increasing your energy bills? The frost build-up might be making your fridge use more energy to keep its temperature steady.
Defrost your mini fridge regularly for better performance and longevity. Start defrosting when you notice these signs.
Preparing Your Mini Fridge for Defrosting
Having issues with ice build-up in your mini fridge? Let’s get it ready for defrosting in a few simple steps.
First, clear out your mini fridge. Remove all items, whether perishable or not, and don’t forget to take out the shelves and trays too.
- Perishable items: Use an ice box or cooler to store these items temporarily to keep them fresh.
- Non-perishable items: You can place these anywhere outside the fridge. Remember to store them properly to prevent any damage.
- Shelves and Trays: Remove these from the mini fridge. You can clean them individually while the fridge is defrosting.
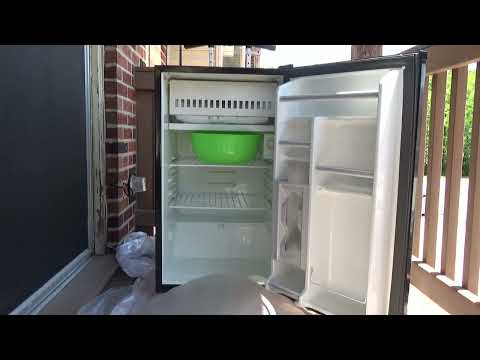
Clear the mini fridge, then unplug it for safety during defrosting. Leave the door open to melt the ice.
What About the Melted Ice?
Wondering where the melted ice will go? Put a large tray or pan under the fridge to catch it. Place some towels around the fridge’s base for any potential spills.
Defrosting a mini fridge can take several hours. Use this wait time to clean the removed shelves and trays. That’s it! Your mini fridge is ready for defrosting. Ready to make it frost-free?
Tools You Need to Defrost Your Mini Fridge
Want to know how to defrost a mini fridge? You just need some common household items. Here’s what’s required.
- Towels: Useful for absorbing melting ice water.
- Hair Dryer: This is a quick and easy way to melt the ice. However, ensure it’s safe to use around water to avoid any accidents.
- Plastic Scraper: A spatula or a plastic ice scraper works best for gently removing ice without damaging the fridge.
- Bowl of Warm Water: Just in case you don’t have a hairdryer, a bowl of warm water can also do the trick.
- White Vinegar: This is for cleaning the fridge once the ice is removed. It works well to remove any odors.
| Tool | Use Case |
|---|---|
| Towels | Soaking up the melted ice |
| Hair Dryer | Quickly melting the ice |
| Plastic Scraper | Gently removing the ice |
| Bowl of Warm Water | Melting the ice (alternative) |
| White Vinegar | Removing odors post-defrosting |
These tools make defrosting your mini fridge easy. Before we begin, let’s remember safety first. Unplug the fridge prior to defrosting.
How to Defrost a Mini Fridge? 3 Effective Methods
Defrosting a mini refrigerator is easy, safe and doesn’t consume much time. It also improves your fridge’s performance and longevity. Regular defrosting keeps your fridge in excellent condition.
Here are the step-by-step instructions to do it effortlessly.
Method #1: Manually Defrosting Your Mini Fridge
Want to remove ice buildup from your mini fridge? Let’s explore the simple process of manual defrosting. You only need patience and some household items to make your mini fridge frost-free. Ready to begin?
Method #2: Using a Hair Dryer to Defrost Your Mini Fridge
Ever considered defrosting your mini fridge with a hair dryer? Though unusual, it’s an effective, quick method.
Voila! You’ve successfully defrosted your mini fridge using a hair dryer.
Caution: This quicker method uses a hair dryer and may require more energy. Always stay safe and never leave the hair dryer alone while operating.
Method #3: Using Hot Water to Defrost Your Mini Fridge
Seeing a thick layer of ice in your mini fridge can be annoying. To solve this, you can easily defrost your fridge using hot water. Why hot water? It accelerates the ice melting process. Let’s explore this method.
Unplug the mini fridge first for safety. Then, empty the fridge. Place towels around the fridge base to absorb melting water.
Then, fill a bowl or pan with hot water. Make sure the water isn’t boiling, as it can potentially harm your fridge’s interior. Hot tap water should do the trick just fine.
Next, place the bowl or pan inside the mini fridge on one of the shelves. Make sure it’s secure and won’t spill over.
Just wait and watch the hot water melt the ice. Replace the water as needed. It’s a simple method. However, bear in mind that combining electricity and water can be hazardous.
Tips for Speeding Up the Defrosting Process
Ever wondered how to defrost your mini fridge faster? There are several methods to expedite this process.
For an effortless method, try a defrosting tray. Just put it in the fridge and it will do its work. This tray quickens defrosting by absorbing the cold.
Cleaning Your Mini Fridge After Defrosting
After defrosting your mini fridge, it’s important to clean it. This maintains efficiency and extends its lifespan. Here’s how to make your mini fridge shine.
Begin by clearing any items left in your fridge. Ensure you inspect all sections, drawers, and hidden spots.
Next, create a cleaning solution. You can easily make this with ingredients you probably already have. Combine one part white vinegar with two parts warm water. This solution effectively eliminates stains and odors. The vinegar smell will vanish once the fridge is dry.
Start cleaning! Use a clean cloth or sponge with your homemade solution to scrub the interior. Focus on sticky or tough stains. Avoid abrasive materials to prevent fridge surface damage.
Remove, clean, and dry shelves and drawers before returning them to the fridge.
After cleaning, thoroughly dry the interior with a clean towel to avoid mold and mildew. Enjoy your clean and shiny mini fridge.
After cleaning your mini fridge, return your items to it. Ensure all containers are clean, especially if they were in the fridge during defrosting. Now, your mini fridge is defrosted, clean, and ready to use!
Conclusion: Keeping Your Mini Fridge Frost-Free
This guide has provided steps to defrost your mini fridge, which will help maintain its condition and performance. Regular preventative care can help avoid any issues.
Now, it’s about maintaining your appliance. Here are some tips:
- Regular Checks: Regularly check for frost build-up for easy defrosting.
- Door Seals: Regularly check that the door seals are clean and undamaged to prevent frost.
- Temperature: Maintain a balanced temperature to prevent frost and spoiling food.
Regular maintenance can prevent the need for frequent defrosting and provide a better cooling experience. Defrosting a mini fridge can be simple with the right guide and tools. Take care of your mini fridge and enjoy the benefits.
